
This article contains information about the required print settings to use for Lacerte® organizers and engagement letters. For information on how to prepare batch organizers, see Uploading Batch Organizers.
Important
You must follow these guidelines to ensure a successful upload.
- Condensed organizers are not currently supported.
- You must use the File (PDF) option in Print Settings to print to PDF.
- Do not include any additional headers or footers.
- Do not customize the questionnaire. Use the Questionnaire Def. setting.
- When printing a Lacerte® organizer to PDF:
- Do not include engagement letters. Print them to a separate PDF.
- The Client Information page must be included in organizer PDFs.
To create a separate PDF for your engagement letters, you print an organizer with all other pages suppressed.
Selecting Clients for the Engagement Letters
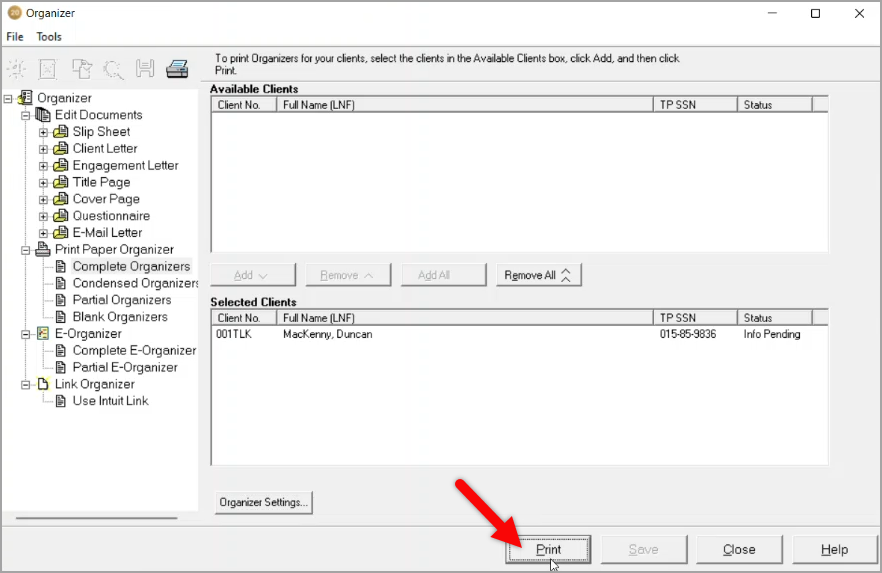
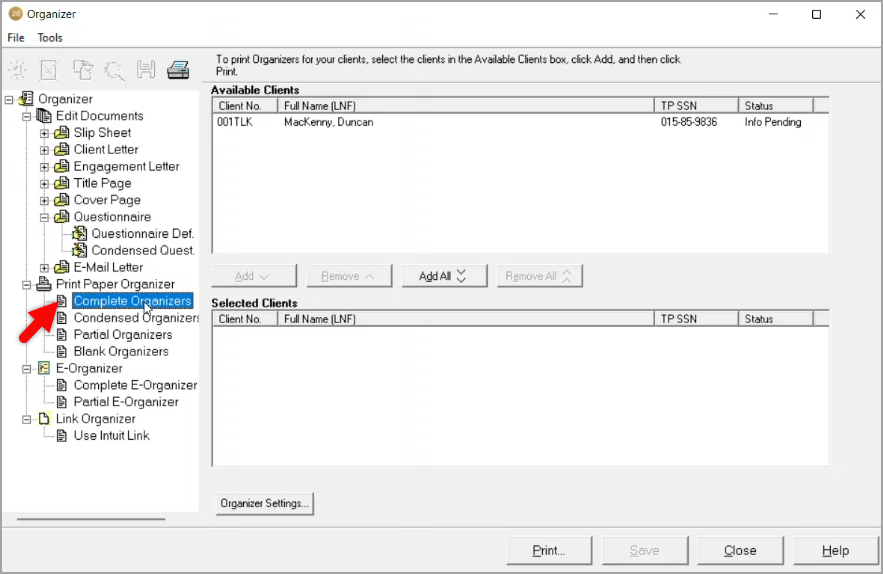
- Go to Tools > Organizer...
- Go to Print Paper Organizer and click Complete Organizers.
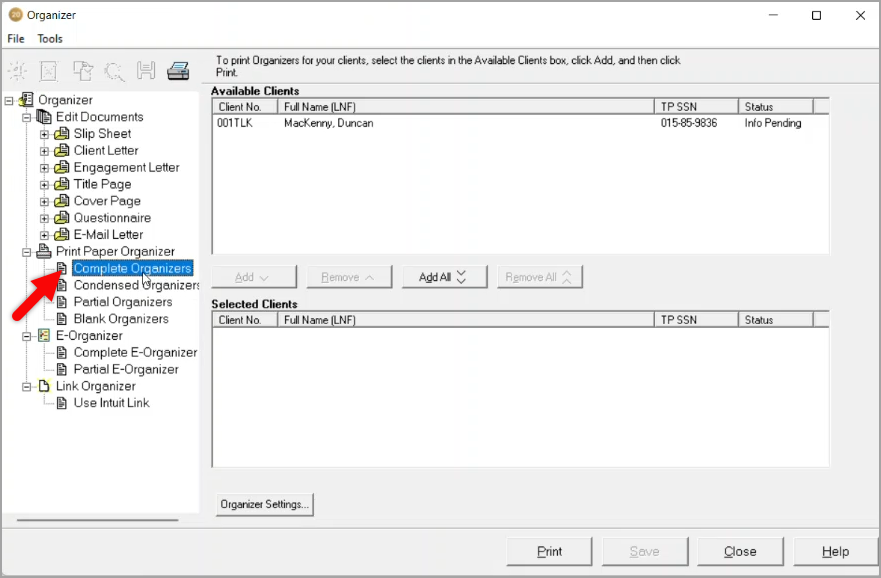
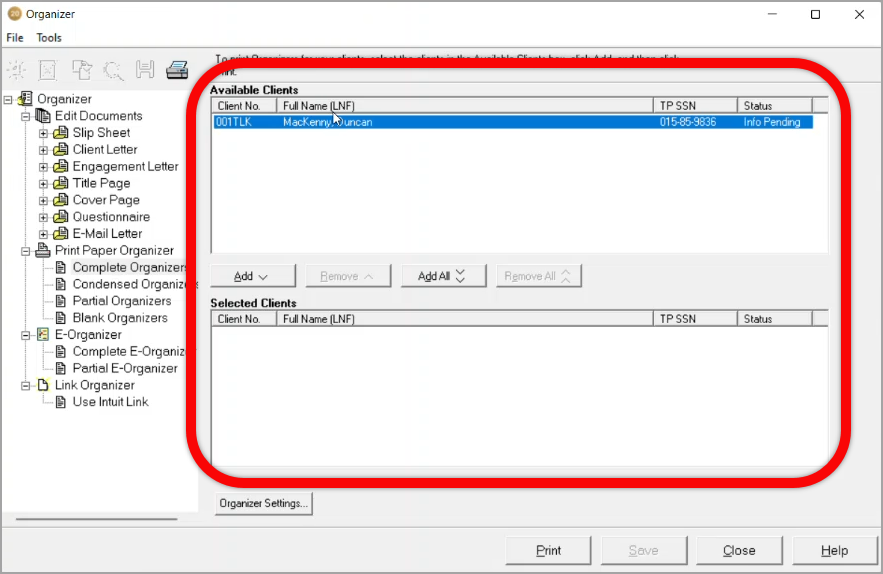
- Select clients from the Available Clients list and press Add. They will appear in the Selected Clients list.
Configuring Organizer Settings for Engagement Letters
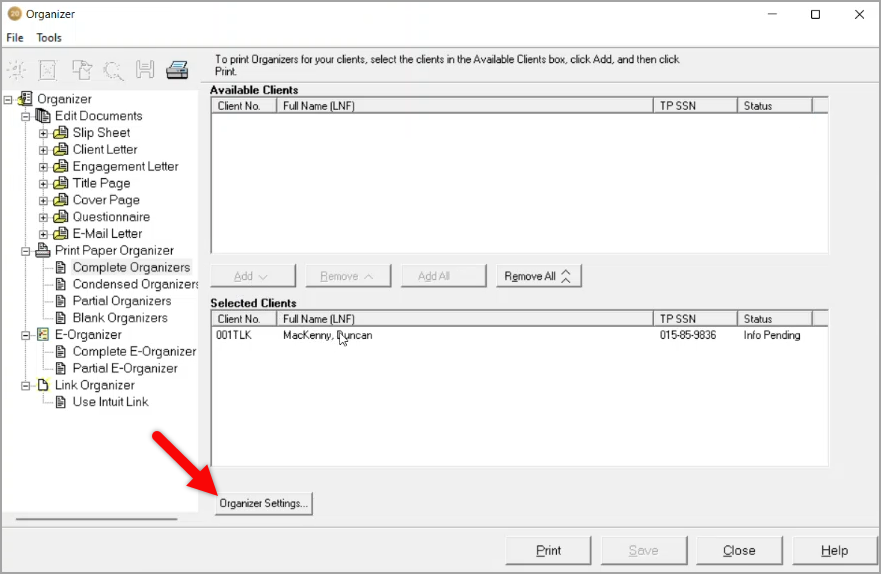
- Click Organizer Settings...
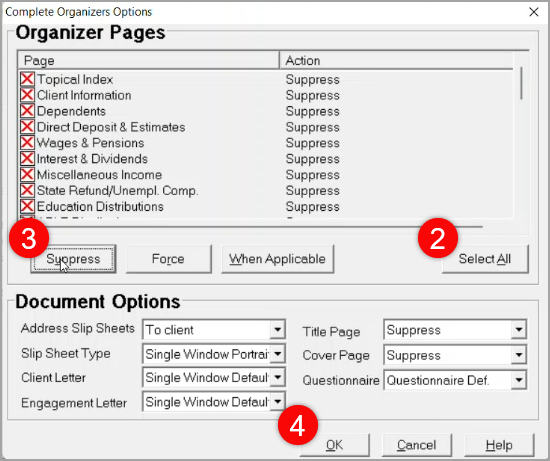
- Click Select All to highlight all the organizer pages.
- Click Suppress.
- Click Ok.
Configuring Complete Organizer Settings for Engagement Letters
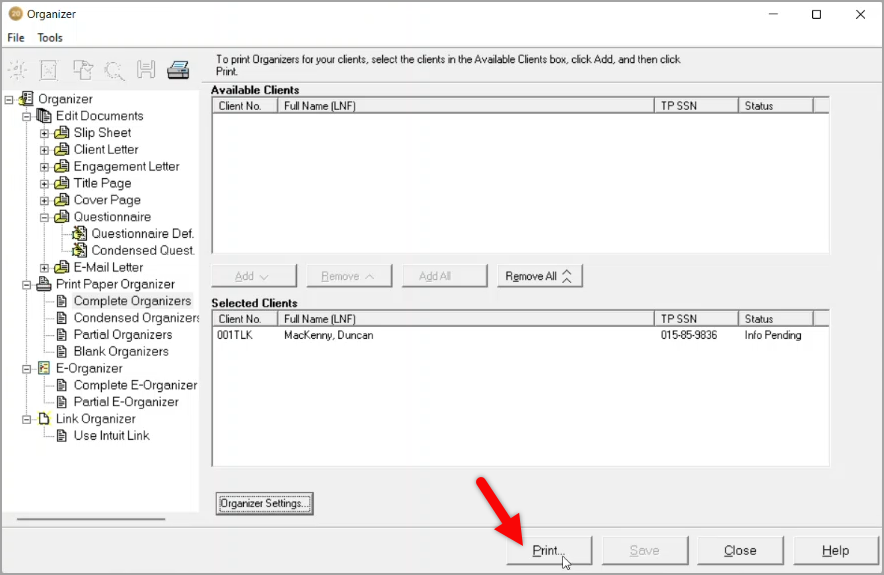
- Click Print.
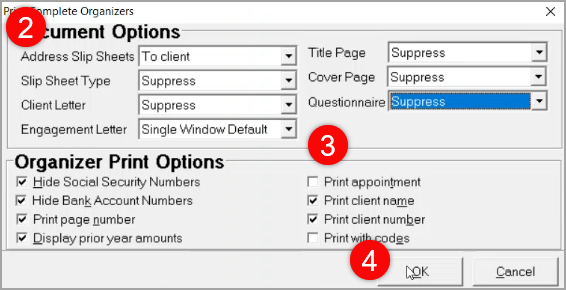
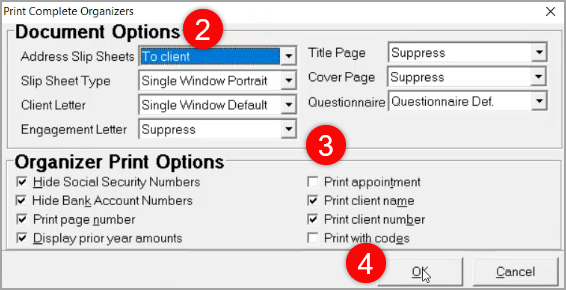
- Change the following document options:
- Click Slip Sheet Type and select Suppress.
- Click Client Letter and select Suppress.
- Click Engagement Letter and select Single Window Default.
- Click Questionnaire and select Suppress.
- Make sure all other settings match what is shown below.
- Click Ok.
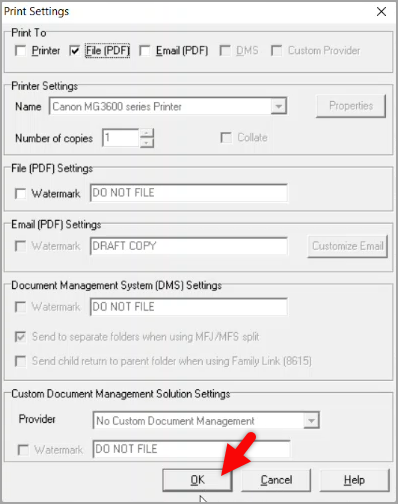
Print Settings for Engagement Letters
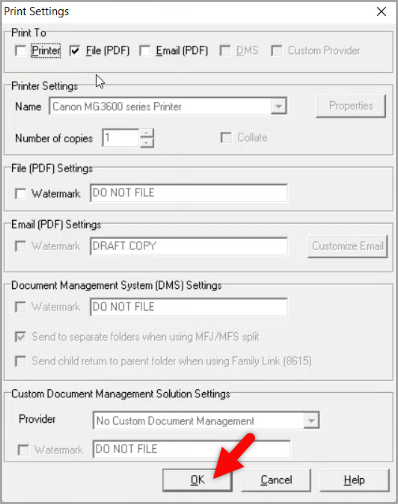
- Uncheck the box next to Printer.
- Check the box next to File (PDF).
- (Optional) If a PDF window with instructions from Lacerte appears, click Ok.
- Make sure all other settings match what is shown below.
- Click OK.
- (Optional) If printing to a batch, change the filename to match the format Engagement Letter_<Client ID>.
- Click Save.
Configuring the Default Questionnaire for Organizers
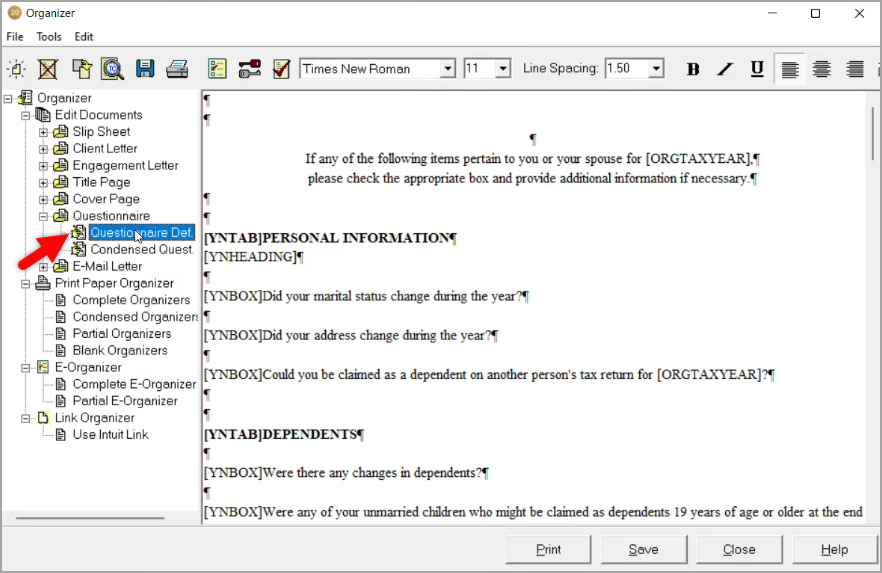
- Go to Tools > Organizer...
- Click Questionnaire in the left pane to expand it.
- Click Questionnaire Def. and make sure the settings match what is shown below.
Selecting Clients for the Organizers
- Go to Print Paper Organizer and click Complete Organizers.
- Select clients from the Available Clients list and click Add. They will appear in the Selected Clients list.

Configuring Organizer Settings
- Click Organizer Settings...
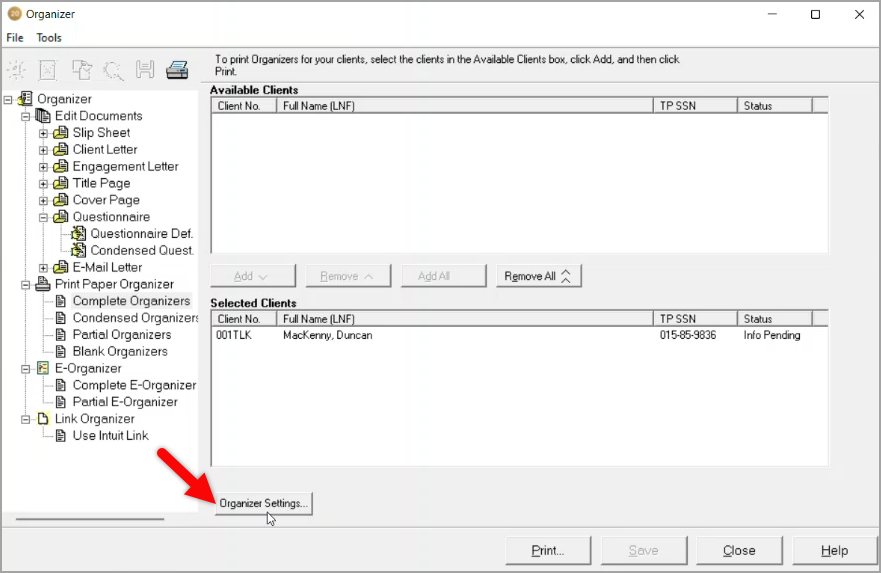
- Click the Client Information page and set its action to Force.
- Click Ok.

Info
You may choose to include or exclude other pages as necessary, but the Client Information page must be in the organizer PDF when uploading to SafeSend Organizers.
Configuring Complete Organizer Settings
- Click Print.
- Change the following document options:
- Click Slip Sheet Type and select Single Window Portrait.
- Click Client Letter and select Single Window Default.
- Click Engagement Letter and select Suppress.
- Click Questionnaire and select Questionnaire Def.
- Make sure all other settings match what is shown below.
- Click Ok.
Print Settings for Organizers
- Uncheck the box next to Printer.
- Check the box next to File (PDF).
- (Optional) If a PDF window with instructions from Lacerte appears, click Ok.
- Make sure all other settings match what is shown below.
- Click OK.
- (Optional) If printing to a batch, change the filename to match the format Organizer Forms - <Client ID>.
- Click Save.
Comments
Article is closed for comments.